Instructions:
- Use one of your own photographs for this assignment.
- Select one of the filters in Photoshop Elements and experiment with what the filter does.
- You cannot select a filter that has already been selected and posted by another student.
- Post the original image and the filtered image.
- Give a brief description of what the filter does and when it would be appropriate to use the feature.
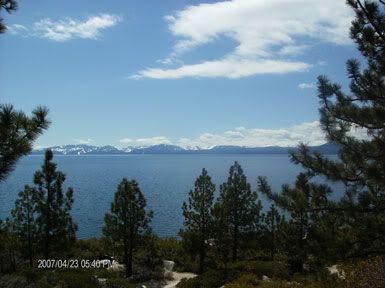
Original Photograph: Lake Tahoe, Nevada

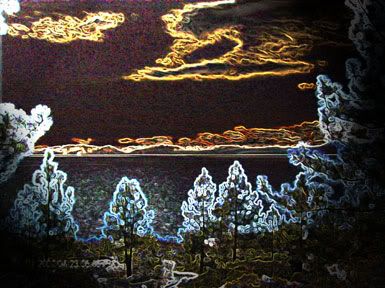
Edited Photograph:

Steps Taken to Manipulate the Photograpgh:
- With the duplicate copy of the original active, I went to the Effects Panel, clicked the Filters icon, chose the Stylize
selection from the Library Drop-Down Menu, and then clicked the Glowing Edges icon. From the Glowing Edges
panel, I changed the controls: Edge Width: 5; Edge Brightness: 20; Edge Smoothness: 15.
- Next, I changed the selection of the Library Drop-Down Menu to Render, and clicked the lower left apple icon
(Lighting Effects). From the Lighting Effects Panel, I selected Crossing from the Style drop-Down menu, and
Spotlight from the Light Type drop-down menu. I then went back to the same Lighting Effects panel and applied
the Crossing Down and Spotlight effects.
- In this particular case, using the Glowing Effect filter gives the image an artistic look, like an oil-type painting with
a glow to it. This filter highlights the major parts of the image, but you would only use it if you desired
this type of effect.
- NOTE: Previous to this, I tried several options from both menus, and used the adjustment levers. It amazes me how
many choices there are with this tool! By experimenting, most options seem to have given un-wanted results!
I liked the result from the above selections better than anything else so far.
Cleveland Bench Project:
I originally used this picture for this project since it needed some kind of improvement. My first intention of this
assignment was that we were to improve a lousy picture, but after viewing other student projects, I realized that
maybe I had the wrong intent of the project.Since I spent a lot of time on this, I added this example.
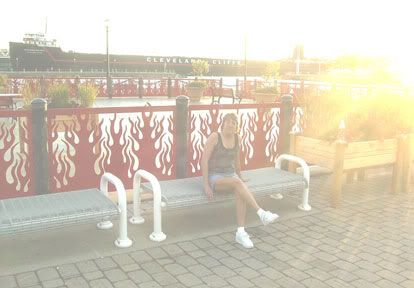
Original Photograph: Cleveland

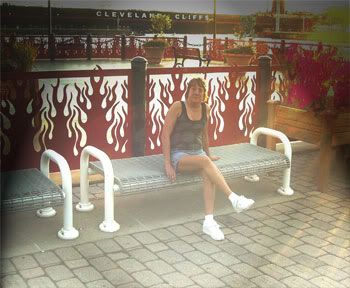
Edited Photograph:

Steps Taken to Manipulate the Photograpgh:
- I went to the Enhance Menu and chose Adjust Lighting, went to Brightness/Contrast and dimmed the Brightness
control to -100, plus changed the Contrast to +85. I then cropped the picture with the Crop Tool, leaving just
a bit of the flower bed area on the right of me.
- I selected the area that had the extra lighting, and adjusted the lighting again. Brightness: -19; Contrast: -36.
- Next, I made a few adjustments: Selected far right tree and used the Replace Color command: Hue: +6; Saturation: -64;
Lightness: -12. I then selected most of the flowers in the flower bed with the Magic Wand Tool, and used the
Adjust Hue/Saturation command. Here, I made several changes.
- Last, I went to the Effects Panel and used the Crossing and Crossing Down choices, as I did in the Lake Tahoe picture.
GO BACK TO TOP OF PAGE
